This morning I had an epic fail with a student who needed to format a history paper with page numbers in the format: [her last name] p#. The tricky aspect was that there was not supposed to be a page number on page one. We went through a ridiculously cumbersome process of making section breaks, trying to get the format different on page 2 and beyond. We never succeeded and instead reformatted and printed each page separately. Unfortunately, she was 15 minutes late to class.
So I was on a mission to find the most elegant way to achieve this. The Word help menu actually did help. As always there are multiple ways to do a job in MS Office, but this is the simplest way I found:
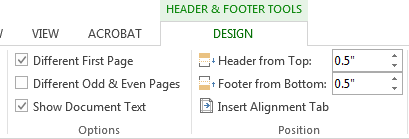
From the Insert Ribbon, choose Page Number from the Header and Footer section (toward the right). At that point you can choose styles for page numbers; for me that was a top of the page, right justified, plain number. BUT as soon as I chose that, I could edit and add name before number, which wonderfully then showed up on each of the next consecutively numbered pages. The problem was that page one still had the unwanted page number. The solution is way too simple. Using the Header Footer tools, just click the box that says Different First Page.
Then I could go to the page one header and add the course name and number, instructor name, full student, or anything else desired without messing up the numbering in the rest of the document.
A small problem occurred because page numbers also mysteriously appeared in the footer. To get rid of them, click in the footer to activate header & footer tools; choose footer on the left side of that ribbon, and select remove footer. If a student has content such as footnotes in the footer, I don't know what the solution would be, since the remove page numbers command erases everything I worked so hard to perfect. Arrgh!
If any of you has similar little lessons to share which would help with tasks students frequently ask about, PLEASE send them to me or post directly to the blog. If would be wonderful to someday take enough training to be a Microsoft product pro, but until then, let's help each other. THANKS!
Showing posts with label MS Word. Show all posts
Wednesday, November 18, 2015
Thursday, January 15, 2015
The IT department sent out an email this week to the students. You may get questions so I wanted you to see what they received. It deals with GPC email on their phone or tablet, using Lynda.com to improve skills and getting Microsoft Office FREE. Click on the IT Update link below for more information.
IT Update
IT Update
Wednesday, November 5, 2014
Hanging Indent
Lots of research papers are being printed these days. A frequent question is how to make a hanging indent in MS Word. Remember that MLA citations are double spaced, so make sure the format of the paper/page is established at that line spacing. Then highlight the citations to be formatted and click on the small arrow in the lower right of the paragraph section on the top ribbon.
A dialog box will open. You'll need to find the window labeled "special" and choose hanging. You can also make sure that line spacing is correct and the .5 indent is selected. Then click OK at the bottom of the page.
Voila! Hanging indents without tons of tabbing.
A dialog box will open. You'll need to find the window labeled "special" and choose hanging. You can also make sure that line spacing is correct and the .5 indent is selected. Then click OK at the bottom of the page.
Voila! Hanging indents without tons of tabbing.
Subscribe to:
Posts (Atom)